Showing posts with label Quilts / Quilting. Show all posts

Sunday, August 12, 2012

Combining Blogs . . . For Now

Since I'm not managing to do enough quilting these days to warrant keeping my quilting blog up-to-date, I'm going to take the easy way out (at least for the foreseeable future) and post about my handwork projects here on this blog. (Clear as mud?)

I did take an R & R day last Thursday and spent most of the day in my quilt room finishing up a set of three table runners I've been working on little by little all summer. They've been dubbed my "summer" table runners and were put into place on August 10th. (Hey, it is still technically summer, right?)

They're all different . . .

. . . but I used the same assortment of green and neutral fabrics in each one.

This one made up of three blocks of Courthouse Steps ended up on our phone shelf.

The one I made using the Split Rail Fence design is all but hidden under the basket that we use to hold materials to go back to the library and outgoing mail.

Simple squares set on point form the design in this runner on this display shelf in a bookcase/storage unit at one end of the kitchen.

When my dear husband noticed them, he said I'd better get busy on ones for fall. Fortunately, I have two matching autumnal-toned runners that I really like so I'll just have to come up with one more that will look good with the other two. Plenty of time for that. Uh-huh, sure. Methinks fall will be officially here before I know it!

Thursday, January 13, 2011

Welcome to My Sanctuary

Yesterday The Apple Pie Gal did an excellent post on her quilt/sewing room which actually isn't a room at all, but rather a corner of a room. Her point was that even though you don't have a whole room in which to set up shop, you can still find an area to make your own.

She indicated she'd like to have a look-see at my quilting area. I am lucky enough to have a whole room to call my own. But this certainly wasn't always the case. In forty-plus years of living in various houses, this is the first time I've had a room (yes, a WHOLE room!) that is strictly mine. Maybe hubby just got tired of eating on the kitchen table amidst rotary cutters and seam rippers. Because it was on the kitchen table that I quilted for many, many years using three shelves in a small cabinet for all of my storage. Well, the cabinet and boxes stashed under the bed, in closets, wherever I could smoosh them in. (And where I sometimes forgot I put them.)

My room is 12' x 16'. The door to it opens off what will be my new kitchen when our remodeling is done. As you step in the door, this is what you see.


Directly across the room is a wall of storage. (More of that later.)

If I shut the door and look to my left, this is what you will see. Storage of my Big Board (which hubby made for me) and a storage chest with TV (that does work occasionally) on top of it.

Also on the wall a little farther down is my cutting table. The shelves under the table hold boxes of fabric and other sewing supplies.

A closer look at the top of the cutting table.

Back to the storage wall.

The left side contains more fabric and general storage areas. I have back copies of quilting magazines in containers on the floor.

The right side is for storage of wall hanging and quilts I use for seasonal decorations in the house and projects in progress.

If you keep going clockwise around the room, next comes a wall with thread racks, calendar, clock, etc.

This is my work table where I keep my two machines permanently set up. I use each machine for specific sewing jobs. I do all my piecing on the machine on the left. My chairs are swivel chairs on wheels so when I'm piecing, I swivel around to the ironing board to press without having to get up.

When I planned this room, I made the choice to sacrifice storage space in order to have two design walls. You see the smaller one above (with the applique on it) with a glimpse of the other one that covers nearly a whole wall.

My big design wall goes floor to ceiling and will hold a full-sized quilt (queen or king size if I really squeeze it) for layout before piecing. I can't tell you how often these design walls have proved themselves out. Sometimes I have to leave a project there for days to decide if I have color combinations right or make a decision as how to quilt a piece. Love my design walls.

Then we are right back to the door again.

Although I've never yet done it, I have this burning desire to hole up in my quilting room for three or four days straight, coming out only to grab something to eat, make a bathroom stop or sleep a few hours. It is such a wonderful, cozy, well-set up room (for me anyway) that do you see why I'm so frustrated I'm not finding more time to spend in there?

Friday, December 3, 2010

It's Done!

Whew. I finished the wall hanging at 5:30 this afternoon for Chicken Mama's open house and sale tomorrow. Whew again.

Here are some pictures so you can see the process.

First I laid out all the 2" squares on my design wall, stood back and took a good look. Some squares needed to be changed and rearranged, but I quickly realized that I could stand there and make changes for two or three days if I didn't say "Good enough!" and get on with it. Next step was to start sewing the squares together. The size of the thing sure does shrink right down when you start putting the squares together with quarter inch seams.

All squares sewn together and ready for the applique on top of the background. The plain blocks in the center are just muslin squares I used as "plugs" because the applique will completely cover that area.

A big, green evergreen tree went on first. That was easy.

Then started the painstakingly s-l-o-w process of fussy cutting out all the decorations for the tree, putting them on bonding material, cutting them out again and then bonding them to the tree. Doesn't look like that much now that it's done, but believe you me, it took days.

Chicken Mama asked that I put a "Welcome" block on the bottom of the piece so I constructed that to fit as part of the wall hanging.

After the tree was fully decorated, there were wrapped gifts to make and arrange under the tree.

Here's a detail of the applique on the tree. Darn good thing all the individual pieces were just bonded on with heat; I would never have lived through traditional applique and sewing them on by hand. And you can see they were too detailed to do by machine.

And here is the finished piece. I'll get a picture of it on the door to Chicken Mama's office tomorrow at the open house.

See you there!

Sunday, August 9, 2009

Good Idea . . . Or Bad?

I've just started another blog. Made my first post today.

As I explain on the new blog (Mama Pea Quilts), for some time I've wanted to create an online market for my hand made baby quilts. In conjunction with that, blogging about my quilting activities seemed a logical thing to do so . . . ta-dah! Mama Pea Quilts made its debut today.

But, yikes, can I keep up with two blogs? Heck, can I keep up with the quilting when the quilts start to sell? (Hmm, actually selling the quilts . . . well now. Wouldn't that be a pleasant happenstance!)

I guess I'll find out the demands of both new endeavors soon enough. In all seriousness, both selling my baby quilts online and writing a quilting blog is something I look forward to very much and have entered into with a lot of enthusiasm.

Even if you're not a quilter, the blog may hold some interest for you. (Maybe it will convince you to BECOME a quilter!) Or perhaps someday you might be in the market for a hand made baby quilt for your own wee one or grandbaby or to give as a gift.

When you have the time, I'd love it if you'd take a short side trip over to Mama Pea Quilts . . . and be sure to share your comments with me.

This new venture of mine? I think it's a GOOD idea and I'm rarin' to go!


Wednesday, May 6, 2009

Small Sample Blocks . . . Done!

Finished up the little 4" sample quilt blocks this past weekend to hang on the pegs of the drying rack in our bathroom.


I knew before I was even close to finished which four I was going to like best out of the six I made. My four faves:


This one was super-easy, but pleasing. - Cotton Reels


I had to fight with this one a bit to keep it in a square shape. It wanted to keep twisting. – Louisiana


Simple, and yet interesting. Clean. - King's Crown


Really liked this one and I'm going to use it in a baby quilt soon. - Double X #3


And here they are lined up on their pegs adding some color and interest to the plain wall behind the rack. Enjoyable project . . . I'm glad I did it.


Thursday, April 30, 2009

Sample Blocks

In my quilting, I'm particularly drawn to the old-fashioned, traditional blocks that have been used for years and years. I think I could spend all the rest of my quilting days working with these old patterns and never get bored.


I get teased about the "fancy-schmancy" potholders I make. "Why do you spend so much time making pieced blocks just for potholders?" For one thing, I simply enjoy looking at the potholders when I use them. But most of all, it gives me a chance to "test drive" different blocks to see if I might like to use them in a quilt.


I recently started these small sample blocks to hang as decoration on the pegs of a drying rack in our bathroom.


The little baskets hanging on the pegs right now will come down as soon as I get my sample blocks finished and choose my favorite four of the six to use.

Experimenting with the six different pattern blocks taught me how they actually look when constructed out of fabric, and how easy (or not) they are to piece.


The above block fell into the category of "or not." I fought with that center diagonal strip of pieced triangles longer than I should have and the (supposed to be) matching points are still pret-ty bad. What if I had cut out all the fabric to make a baby quilt out of this particular block before doing a sample? I'd have either gone crazy, committed hari kari, or wasted a lot of fabric. No way I would have struggled through the construction of forty or fifty of those little recalcitrant buggers.


I may never actually use any of the above block patterns in a quilt, but who cares? I still get a lot of enjoyment in playing with the samples. And I'll definitely keep making "fancy-schmancy" potholders!


Friday, April 17, 2009

When Quilting Rooms Are Neglected

This calls for immediate action. I'm going to go grab a big glass of iced tea (no, it's not 'iced tea weather' yet . . . it's just my drink of choice year 'round) . . .


I'm going to go grab a big glass of iced tea (maybe with just a wee schmawk of Amaretto in it) . . .


I'm going to go grab a big glass of iced tea right now and quickly bring my quilt room back to some sense of decency.


Then I'm going to put a frozen pizza in the oven for dinner (quick and easy, very little clean-up) and then I'm going to spend tonight in my newly organized and cleaned quilt room working on the little 4" x 4" quilt blocks I'm making to hang as decoration on the pegs of the drying rack in the bathroom.


Sounds like a great Friday night to me.


Wednesday, April 15, 2009

Spring Wildlife Wall Hanging

Several years ago I bought six black and white blocks depicting wildlife and trees we see up here in the North Woods. I stored them away in one of my boxes of quilting fabric waiting for inspiration to strike as to the best way to use them in a quilted piece. Well, now I only have three of them still left waiting for inspiration because I finally used three in this wall hanging.


I wanted to create something to use in the early spring months. A time that is still without much color up here so the black and white blocks fill the bill for that. The surrounding colors I chose, worked in a modified Log Cabin block, add color to the piece along with reminding me of the pastels of early blooms and greenings mixed with the darker colors of branches and twigs.


I machine pieced and hand quilted it.


I did some quilting in each wildlife block to give it texture. (Unfortunately, I lack the photographic skill to make the hand quilting show up in the above photo. Or perhaps lack a good enough camera. Or perhaps a combination of both!)


Now, anybody got a good idea for a quilted piece using a block of bald eagles soaring, a clump of birch trees, and evergreens on a hillside?


Wednesday, February 11, 2009

Spring Wall Hanging

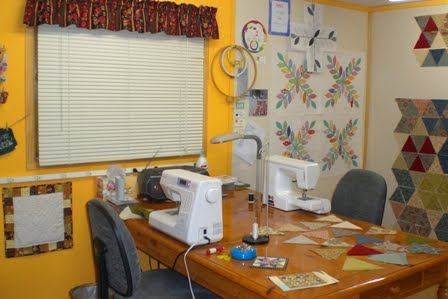
Now don't get me wrong. I'm not ready for winter to be over. I still need lots more time in my quilt room this winter season for my mental health and well-being. But some part of me must be at least thinking of spring, because I had a definite yearning to dig out and finish this wall hanging.


I've had it in progress for some time. Actually, I started planning it and pulling out some fabrics, way LAST spring when I discovered a spot in the house that really needed a long, narrow wall hanging. I got as far as cutting out the applique pieces . . . and that was it. The applique block isn't original; I saw it in a book, "Bits & Pieces," by Karen Costello Soltys.


Selecting the right color combinations for a piece, whether it be large or small, is very much my weakest area when quilting. Even if the colors look great spread out on the cutting table, sometimes after they are made up into the quilt, they're a dismal dud of a failure. Experts say the only way to get better at this is to keep trying. So I plod on, smacking myself on the forehead every time I make a really, really bad choice.


So here are my three appliqued blocks. I chose a light, soft, spring green for the background. Where to go from here? What to use to join the blocks together?


I finally decided to sash them in the same green because I didn't want anything too close to the blocks that would detract from them. Then on to auditioning colors/fabrics for the inner border.


I used a narrow strip of yellow to bring out the yellow flowers in the green floral print appliqued parts. Then just a tiny border of rose striped fabric to tie in with the deep rose of the round applique shapes. Next the final outer border.


This took me the longest but I finally settled on a small white and green gingham check outer border. Here the whole piece is sandwiched with backing and batting, held all together with quilting pins and ready for me to hand quilt.


I decided to bind it in a repeat of the same yellow fabric I used for the first inner border. The finished product, and a closer look at some of the quilting. Not a bad color combo for early spring, although I could talk myself into thinking it looks a little washed-out. I lean more toward the brighter, bolder colors much of the time which isn't necessarily good. As they say, I need to learn to make myself work "outside the box" and experiment with colors I don't usually use. Feels good to have it all set and ready for this spring.


Sunday, February 1, 2009

Baby Quilt and Doll Quilt

Yessir, I made it a priority and did spend some hours in my quilt room this weekend. (And a good time was had by all . . . well, by me for sure, anyway.)

Here's the quilt for the little baby boy that was born this past week.


It measures approximately 35" x 41" and should be a good size for bundling around his car seat to help keep him toasty for the rest of this winter.


I machine quilted it since I'm hoping it will get used a lot . . . and, therefore, have to be thrown in the washer a lot. Some baby quilts are made to be hung on the wall in the nursery or used just for decoration, and I have made a few of those which I hand quilted. But bottom line, hand quilting just doesn't hold up if a quilt is being used and laundered with any regularity. I'd like to think this one will be used to keep this little Minnesota boy warm so I made it with durability in mind.


Since the little guy's "big" sister was clutching a favorite doll in the picture I saw of her and the newborn, I thought she might like to get a quilt for her own "baby.”


It's a mini 16" x 20" and should be a manageable size for an almost two-year old.


Machine quilted it, too, since it may get dirtier than the baby's quilt!


Lest you think I'm some kind of Wonder Woman in the quilt room, I must confess I had the larger quilt a ways along before this weekend. So it just needed finishing up. Whenever I make a quilt or wall hanging, I save all the extra bits and pieces of material in an individual bag. I've always had it in the back of my mind that someday (that elusive "someday") I'll take my gazillion little bags of scraps and create this fantastic, original quilt that will knock socks off everyone near and far. In the meantime (ahem), it's very convenient to be able to grab one of those little bags and have pieces of fabric cut and ready to be made into something like this little doll quilt. So that one went together quickly, too.


Now just need to package the two items up and send them off. Sounds like a trip into town and the post office early this coming week.